SUPER SCORE!! My husband and I found this cool 1950’s teak sofa and loveseat for 100 bucks. Actually, the original set included a chair as well, but we did not have room for it so I sold it separately. The upholstery on this sofa set was in a sad state of affairs due to kitty scratching and 50 years of use, but the frame was in fantastic shape and super solid. You know the old saying, “They don’t make them like they used to.”, well in this case…it’s TRUE.
With a bit of work, here is what they look like now.
Right off the bat you will notice a few changes we made to the set. The most obvious being the material, but on top of that, we also decided to remove the side panels from the arms and forgo the quilted back and the tufting on the back and seat cushions. These changes give the set a more current streamlined appearance.
To begin this project we first removed the Teak frame from the upholstered section. I love Teak for many reasons, one of them being it’s easy care. All we did to give this teak frame an uplift, was to lightly scrub it with a green scrubbing pad and soap and water. Once clean and dried, we treated it with Teak Oil. And that’s it, that’s all…she’s perfect again.
That was the easy part. Now for the upholstery work.
I stripped the old material and quilted backing from the frame. Original foam was in pretty good shape so we left it in tact. I calculated how much material I would need by measuring the two pieces. I then ordered 14 metres of material from a local Stylus supplier. The material was $40 a metre so less than $500.00 total cost.
New batting was added over the back of the sofa.
I then measured, cut and pinned fabric using the frame as a guide. Big thing here is making sure fabric is all running in the same direction. Even if you can’t quit tell when you are sewing it, it will be glaringly obvious when it’s all in place. Take your time and ensure your cuts are right!
With everything sewn I then used my trusty plastic putty knife to shove the material between the seat of the frame and the back of the sofa.
Once in place, looking straight and pulled tight, I stapled the material to the back of the wooden frame.
With the seat in place, I then slipped the material over the back of the sofa and stapled it in place again ensuring the material was straight and tight.
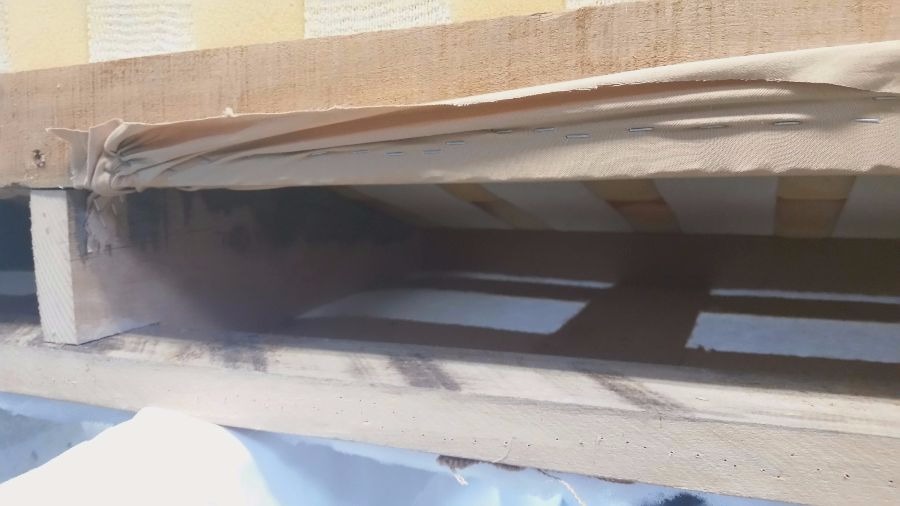
I then stapled the dust cover in place leaving the lower section open to access screw holes for the Teak frame.
Oh so close now! The teak frame was then set back in place…
and reattached to the upholstered portion of the sofa. The last bit of the dust cover was then stapled in place and voila!
I guess I should also mention that I purchased new 4.5″ high density foam measured and cut to size at John’ Bedroom Barn and sewed 5 new cushion covers. The new foam cost $170.00.
Ok , ok, so a little costly and a fair bit of work, but if you are willing to tackle the job yourself you do save HUGE on upholstery costs and you can be sure that these goldie oldies from the 50’s and 60’s will last a lifetime. Great style and built to last…a perfect candidate for an upholstery project.
Looks absolutely fabulous ..a tad envious Colleen.
Great job !!!!
Thanks Andrea. I love it!
Some lenders permit you to borrow up to $a thousand.
Personal credit score of 680 or higher.
Thanks for sharing your thoughts on u. Regards
Solutions exist to help you pay down your scholar loans.
You write a publish dated test for the mortgage fee.
These help you borrow money against your next paycheck.
You apply for a loan and get your money.
Some cards even impose a $10 minimal fee.
I really like it when
folks get together and share ideas.
Great site, stick with it!
Life is the flower for which love is the honey.
Good identical-day loans are arduous to seek out.
Beautiful flowers with such great fragrances.
Choose Funeral Flowers in your time of need.
Take into account sending flowers after the funeral.